Showing posts with label Copic Europe. Show all posts

18 August 2016

Even dinosaurs like cake!

Hello there, today I have an adorable dinosaur who is celebrating his birthday - stamped on white card with Memento Angel Pink ink for that soft, hand drawn look and enhanced with coloured pencils.

As you can see I have opted for a very simple layout on this card, allowing the image to be the focal point!


COPIC COLOURS:
Cake: E42, E43, E44, E47, E71, B01, B02, B04, Y15, YR04
Grass: G20, G12, YG61, YG91
Dinosaur: B0000, W1, W3, W8, YR30, YR20, YR21, E81, E84
                 Y26, Y28, E40, E41, E42, E43
Hat: BG11, BG13, BG18, BG05, BG09

SUPPLIES:
Stamps: Birthdaysaurus by Whipper Snapper Designs
Paper: Personal Impressions Premier Quality Smooth White Card
Colouring Medium: Copics (colour list above), Memento Angel Pink ink, Caran D'Ache Luminance and Pablo pencils
Tools: Corner punch, Washi tape
Size of Card: A2 (USA)

Now, some of you may be aware I am married to a farmer so this time of year is manic in our house - and the boys keep me busy with piles of laundry, as well as prepping, cooking and delivering meals to a bunch of hungry farmers out in the fields......... therefore I suspect these gingies are going to stay like this for a while as, sadly all crafting has had to be suspended.   Fingers crossed, we get a good period of uninterrupted sunshine and Peter can get through the combining as soon as possible.


Happy Crafting everyone
(Here's hoping I get to do some soon.....I have a 21st Birthday card I desperately need to make!)

15 July 2016

Mr Magoo has nothing on you!

This one is for all the myopic crafters and artists out there - yep, I have the eyesight of a mole without my trusty contacts or specs!  And having just had my annual visit to the opticians today (no prescription change, yeay) I thought this goofy little guy was rather appropriate.


As is my thing these days, I have opted for the "no-lines colouring" technique.  This stamp is quite small and delicate and I felt dark lines would have overpowered the image too much.  I also kept the background very subtle, opting for pale colours and using a squiggly/dot pattern so the main focus is on Mr Turtle whilst he tries to impress the hamburger with his awesome chat up lines!!!


COPIC COLOURS
Turtle Shell/Burger Bun: E40, E41, E50, E70, YR30, E42, E43
Turtle Body: BG90, BG93, YG91, YG93
Glasses: B0000, C00
Hearts: R22, R35, W2
Burger: G12, G20, E31, E74, E77, E79, YG91, W2, Y32
Chip bag: B0000, C00, C0, C1, C2, C4, V20, YR30
Fries: E30, E40, E42, E44, E50, E51, E53, YR30, W6
Background: W00, W0, W1, W2, W4, BG0000, YR30

SUPPLIES
Stamps: Hamburger/Turtle??? by Peddlers Pack***
Paper: Personal Impressions Smooth White Card
Colouring Medium: Copic Markers
Size of card: 3.5inch/ 8.8cm square

*** Oh my, so many of you are asking about this little turtle and where you can buy him!  Now please be aware, I bought this wooden stamp many years ago from a store in the UK that has since closed.  I have sent Peddlers Pack an email today asking as to whether they still make this stamp and will post their response on this blog as soon as I hear from them!

UPDATE 29/7 
Sadly, Peddlers Pack have never responded to either my email or FB message.  Thankfully however, I have just been told by one of my readers that Peddlers Pack do in fact still make the stamp!  It would appear you need to call them directly and speak to the owner of the store to get it.


Thanks for visiting today, I hope this little guy made you smile - 'cause that's what art should do, right?


22 June 2016

Summer fruits, sunny days and Copics!

Hello there, who cannot resist a sweet, ripe peach at this time of year?  I certainly can't and nor can this little girl by Mo Manning.

It is another "no-lines" colouring primarily in Copic with a little bit of pencil enhancement to assist with some of the finer, fiddlier details that I just love to add.

To achieve the softer no-lines look I printed Mo Manning's digital stamp using Apple Pages and reduced the opacity of Peaches to 20%, thus printing the image in pale grey rather than the usual black.  The same sort of effect can be achieved using Word or a similar program.

When you add colour to your printed image the lines are less obvious enabling you to create a much more delicate, realistic piece of work, but I strongly advise you to print the image out in black on spare paper so you have something to refer to as you colour.  Trust me, it will save your sanity - it is very easy to get lost, or add something that's not there when the lines start to disappear under your ink!!

The scenery elements in the background were drawn by hand to create a complete picture rather than have Peaches floating in blank space.  My favourite bit has to be the daisies in the foreground, they're basically round dots clustered together using colourless blender to remove some of the green.  I then added a little shadow and yellow centres to give the impression of daisies - really easy to do and they can quickly add depth and interest to your work!


     COPIC COLOURS:
     Background: B0000, B000, G0000, G000, G00, T0, T1, T2, YG0000
     Apron: YR30, E50, W00, W0, W1
     Sandals: E41, E42, E43, W1, W2
     Skin: E0000, E000, E00, V20, R20
     Peach: YR20, YR00, YR02, R32, Y32, W1
     Butterfly: YR0000, YR000, YR00, Y000, YR02, W1


SUPPLIES:
Stamps: Digital image - Peaches by Mo Manning
Paper: Personal Impressions Premier Quality Smooth White Card, Bazzill
Colouring Medium: Copic Markers (colour list above) and Caran D'Ache Pablo and Luminance pencils
Tools: Spellbinders Grand Nestabilities Scalloped Circles, Spellbinders Grand Calibur, Quickutz Cookie Cutter Circles, Epson WF-7515 printer & Apple Pages
Size of card: 13cm


As always thanks for visiting             


16 February 2016

We go together like.........

Back again for my second post of the day!

For Copic Europe today I thought I'd share with you the card I made my dear husband, Peter for Valentine's Day!


This simple image did pose a challenge ......... how to colour "white"
I tend to use a combination of pale blues and greys, focusing on the shadows to give my objects shape and depth - above all resist the temptation to leave it blank!

Taylored Expressions - Perfect Pairs, Milk and Cookies
Background paper from stash
Polaroid die - Quickutz
Copics:
Cookie - W8, E40, E41, E42, E43, E44, R20, E23, E25, E27, E29, RV32, RV34, B0000, W7, V20
Milk - B0000, C00, C0, C1, C2, C3, C4, C5, V20, R24
Background - W00, W0, W1, W2, R0000, R000, R00, R01
Enhanced with Caran D'Ache pencils

Thanks for dropping by

17 January 2016

Ahoy Matey!

I had a little fun with this one and decided to play around with my airbrush, something I've not done in a while!

Without further ado here is my latest creation for Copic Europe:


It was also a good excuse to play with my new crayons that my lovely husband bought me for Christmas: Caran D'Ache Neocolor II water-soluble.
The bonus with these little beauties is that they can be used both wet and dry.........I used them dry for the sand and wet for the sea spray/waves.....I loved how it turned out!!

The pirate image was coloured separately and then cut out with scissors and a craft blade before being mounted on to the sprayed background.

A little tip:
If like me you are rather pernickety about fussy cutting it is wise to always keep your W2 marker handy.  I use it to carefully and lightly go round the edges of my cut images, it ensures that if you are mounting your image on a darker background there won't be any annoying white bits showing, just nice clean crisp black lines!
Whimsy Stamps - Pirate Boy
Sugar Pea - Heart Journal Card Set die
Copic Airbrush
Caran D'Ache Neocolor II crayons
Copics:
Bandana/Shirt - R22, R24, R29, B0000, N0, N1, N2
Waistcoat - E41, E42, E43, E44, E47, E49, W2
Trousers - B91, B93, B95, B97, B99, R29, R24
Sword - E21, E23, E25, E27, E29, E49
Hair - E00, E11, E13, E15, E17, E18
Patch - W0, W2, W4, W6, W8
Face - W9, RV32, RV34, W1, W3, E0000, E000, E00, E40, V20, R30, R20, C00, C0, C1
Hook - C1, C3, C5, C7, C9
Background - B01, B02, BG01, BG02, BG05, BG07, BG13, E55

I don't know about you but when I use my airbrush I always seem to end up spraying myself, I had extremely inky fingers on my left hand where I'd been holding down my masking card - note to self to use more tape next time!
But atleast with my trusty cardboard airbrush booth I can keep my desk nice and clean!
(I cannot remember where I got it, sorry)


I hope this card inspires you all to dust off your airbrushes or go splurge on one and have a go; it really does give you a lovely background to showcase your stamped images and adds another dimension to your Copic colouring!!

Happy Colouring

26 December 2015

Merry Christmas to you all

Well, this was Rudolph out for a training run before Christmas Eve's epic trip around the world pulling Santa's sleigh with his reindeer friends!

He and the other reindeer are now taking a well earned holiday!

Reindeer Flying by Tiddly Inks
(free with either Reindeer Games or Reindeer Kisses)
Stitched Frame die
White gel pen
Sticky foam pads

Copics:
Body - RV32, RV34, W1, E40, E41, E42, E43, E44, YR30, R20, W8
Antlers - E70, E71, E74
Nose - R21, R22, R27, R39
Background - BG0000, BG000, BG01, YR30, BG10, C00, C0, C1, C2, B0000, B000, B00
Scarf - G40, G12, G21, G46, G28, R20, R21, R22, W2, W4

It is not overly clear in the photograph but I actually printed the reindeer twice so that I could fussy cut one and place it on top of the other with foam pads to give the image a little more depth, oh and I  mounted the frame with them too!


I hope you are all having a wonderful Christmas
and I wish you the best for 2016!

26 November 2015

Time to get those decorations out!

It's that time of year again - Christmas.....well, almost!

Anyway here are some adorable penguins helping out with the decorations......

For such a simple image there were quite a few challenges......

Primarily colouring black and white!
In order to obtain the depth and dimension on the penguins I opted for shades of grey rather than black on their bodies whilst their tummies are a combination of pale blue and very pale grey.

As always I chose to stamp out my image using Memento Angel Pink to give my finished piece a softer no-lines look.

The upper background was created using my trusty YR30, a small natural sponge and some Isopropyl.
I coloured the chosen area with the copic marker, then sprayed the sponge with Isopropyl, dabbing it on some waste card to remove the excess before dabbing it onto the marker. As you can see it gives a lovely mottled texture to the background.  Once dry I then coloured the ground before moving on to the penguins themselves, enhancing some of the finer details with coloured pencils.

Image: Stamping Bella - Christmas Penguins
Sentiment: Happy Christmas set by CC Designs
Memento - Angel Pink and London Fog
Copic colours:
Ground - W00, W0, W1, W2, W3, YR30
Penguins - YR20, YR21, E31, C00, C0, C1, C2, C3, C4, C6, C8, YR31, E33, E34, R32, R56, R59
Bells - YR21, YR24, YR27
Coloured pencil
DP & Mulberry paper from stash

Happy Crafting

31 October 2015

Delicate shades of green in Copics

Copic colours can be vibrant but they can also be used to create soft, delicate shades
and here is an example of this using the no-lines technique.....


As you can see I have also added patterns to the clothing and parcels - those little extra details can really make your colouring stand out.

Tiddly Inks - Wryn Birthday Girl
Various dies

Copic colours:
Dress/Bow - G40, YG11, G12, G21, G46, T1, T2, T3, T4, G20
Ground - W0, W1
Hair - E51, E11, E13, E21, W2, W3
Skin/Eyes - E0000, E000, E00, V20, R20, G43, G46
Gifts - Y0000, Y00, YG0000, YG00, G0000, G00, YG11, G12, R000, R00, R01, RV32, W0, YR30, E50, YR20, W0, W1, G12, YR02, YR0000, YR000, YR00
Shoes - BG10, BG11, BG90, T1, T2

I hope this has inspired you to use some of the softer shades within the Copic colour range and to have a go at adding patterns to your images.

Happy Colouring

26 September 2015

A good excuse for cake!

Celebrating a birthday anyone?


          Cupcake Henry - CC Designs

          Hat - B000, B00, B02, YR20, YR21, Y28, N0, N1, N2, N3
          Skin - W6, W8, B12, B14, V20, E0000, E000, E00, E41, V20, 
          RV32, B0000
          Cake - E50, E51, E21, E23, E27, E34, C00, C0, C2, YR20, YR23, 
          YR82, W5, B00, B02, N1, YR30, E40, E41, E42, E81, W3
          Shirt - YR30, YR20, YR21, E55
          Jeans - B41, B91, B93, B95, B97, C2, C4
          Hair - E40, E41, E42, E43, E44
          Shoes - W0, W1, W2, N1, BG0000, BG000, B00, BG01
          Background - YR30, B0000, B00, C0, C1, C2, C4

I have enhanced my Copic work with Caran D'Ache pencils and sealed it with
Winsor and Newton Professional Fixative to prevent smudging.


Thanks for dropping by today,
 I hope my work has inspired you to get creative with your Copic markers!

Happy Colouring

24 August 2015

Let's hear it for the girls!

Wow, it seems like ages since I last sat here in my studio to blog......
.......not surprising really as it's harvest time here in the UK, I'm married to a farmer and normal life gets put on hold at this time of year!

So it feels quite an achievement to be able to say here is my latest post for Copic Europe - 
I hope you like it!


As is my preference of late I have opted for the no lines technique i.e. printing the image at reduced opacity if using digital images or pale ink when using a stamp.

Super Day by Mo Manning
Papers - June Bug Pad by Basic Grey, Blast Off pad by Bo Bunny
Star and large flag dies


Skin: E0000, E000, E00, V20
Hair: E40, E41, E42, E43, E44
Cape: R20, R21, R22, R24, R29
Sweater: B32, B34, B41
Tights: YR30, E81, B0000, B000, N1, N2
Shirt: B0000, B000, N0, N1, N2
Shoes: R21, R22, R24, R29, B0000, B000,
 B21, B23, N0, N1, N3, N5, W1, W2
Ground: N0, N1

Please note - image has been enhanced with coloured pencils

Thanks for dropping by and I hope this has inspired you to get crafty

4 August 2015

Tips on how to add a little interest to your colouring

This is my first tutorial for Copic Europe and I wanted to share some of the ways I
"play" with Copics.......

So I have a little montage of ways you can add a bit of fun to your colouring!

Lets start with a simple stamp
I have used
Say it Loud! by Art Impressions


It's OK like this, but a bit boring don't you think!!

So to jazz things up a bit I started by stamping it out on Copic suitable card stock using 
Memento Angel Pink, so that I could use the no lines technique
and cut it out using a stitched circle die by Lil'inker Designs


Now I started by creating a background using my "Squiggly Wiggly" method!
Basically you start with your base colour, in this instance B0000 and cover the whole area using the standard Copic circular motion.

You then add squiggles of a darker shade, in this case B000, going over it with the lightest colour to soften the squiggles if necessary. 

Don't get heavy handed with this, light, delicate squiggles work best.


 I finished with a layer of B00 squiggles, softened by B0000 applied in a circular motion as before.


A - B0000 applied in a circular motion
B - B000 squiggles applied to three quarters of box, softened with B0000 
C - B00 squiggles to top left of box
D - Squiggles softened with B0000 applied in circular motion

This technique works best with the palest shades in any of the colour families.

It gives a soft textured almost fluffy appearance to a background and I use this method regularly when I am colouring skies!!!

Now the real fun begins.......
time to play around with your image!


I started by giving each word a 3D appearance, achieved by simple shading, but hey, it's still a bit boring and I like to have fun when colouring.....


I'll show you a close up in a minute, but here is a list of the colours I used for each word

SING: B21, B23, B24, B26
DANCE: B01, B02, B04
LAUGH: B91, B93, B95, B97, 0
LOVE!: B12, B14, B16
shadows applied using N1, N2, N3


DANCE: random dots applied using darkest colour B04
LAUGH: spots created using 0 to remove colour 
LOVE!: Stripes drawn using B16 and B14 mindful of the 3D colouring

I hope you have found this tutorial interesting and whether you try colouring a Squiggly Wiggly background or add a pattern to your images, above all have fun when using your markers!!

Happy Colouring

27 July 2015

Copic Europe creation

Hello there, here is my second post for the Copic Europe Design team
and I've opted for something with a real summery feel.

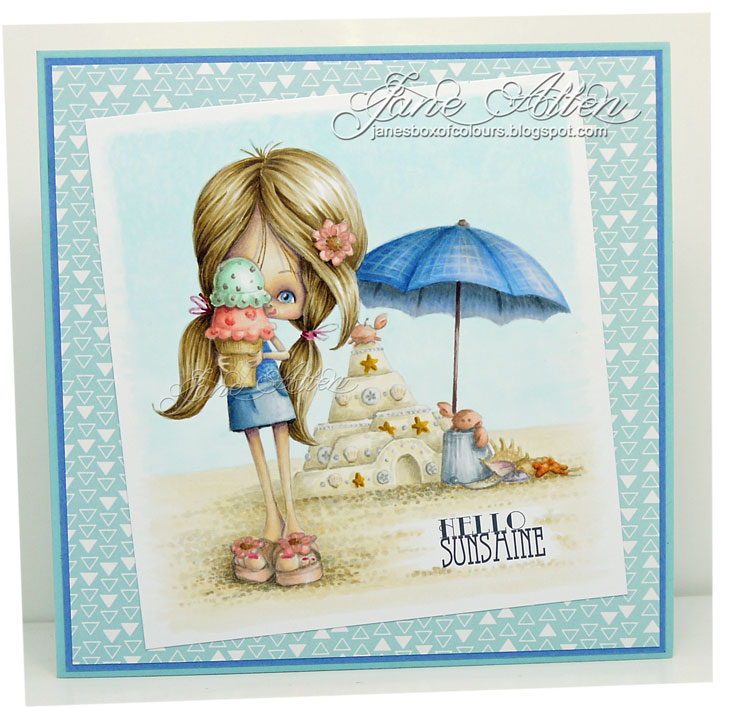
So here is Wryn from Tiddly Inks enjoying a day at the beach.


Sweet treat Wryn & Wryn Beach Bonanza - Tiddly Inks

Copics
Sand - YR30, E40, E41, E42, E50, E51, W0
Sky - B0000, B000
Brolly - E70, E71, E74, B34, B32, B60, B41, N3, N2, N1, N0
Cone - E50, E51, E41, E42
Ice cream - R30, R20, R21, R22, G0000, G000, G00, W0, W1, W2
Bucket - N0, N1, N2
Shell/Fish - BV20, V20, YR21, YR24, E11, E01, R11, R12, E31, E30, E00, YR12, E08, T0, T1, T2, N0, W0, W1, R00
Hair - E40, E42, E43, E44, R89, R83
Flowers/Sandals - E33, E37, R11, R12, W1, R00, R01, W0
Girl - E0000, E000, E00, R20, V20, B41, B45, W7

Enhanced with coloured pencils


I have had several requests to clarify what I mean by "enhanced with pencil"........

Basically colour your image as you would normally with your markers, then with colour matching pencils go over the top in areas you wish to improve.  I use this method to define shadows and highlights, add fine detail & correct areas that have been blighted by the dreaded sticky Copic issue.  
This double colouring technique works especially well with hair - I can get the minute detail of hair strands that is just not possible with markers alone on small images such as the Tiddly Ink above.

I have been using coloured pencils for yonks so I have amassed a huge collection, meaning that colour matching is not much of a problem for me - but please be aware in order for this "double colouring" to work well you need to ensure your pencils match your markers as closely as possible......or your pencil enhancement will stick out like the proverbial sore thumb!!

It also works best with pencils that hold their point, allowing you to add fine detail, but buttery enough that they blend with one another easily on top of your marker work...........and please don't forget to spray your finished piece with fixative.  Pencils do not adhere well to Copic card, it's a tad too smooth for them to key properly so I always spray my combination pieces with Winsor & Newton Professional Fixative - but if you haven't got any or can't afford to splurge on some you can always use my old school days trick.......hairspray!!

Just be careful & don't spray it too close to your work or it will affect the underlying Copic work - been there, done that, wrecked hours of work!!!

I primarily use the following pencils to enhance my Copic colouring:

 Caran D'Ache Pablo's
Caran D'Ache Luminance

and to a lesser degree
Faber Castell Polychromos 
Derwent Artist


Thanks for dropping by

28 June 2015

Here is something I made earlier.....for Copic Europe!!

Who spotted the Copic Europe Design Team banner???

Yes, peeps - I am on the team!

So lets get the show started with a cutey from Whimsy Stamps


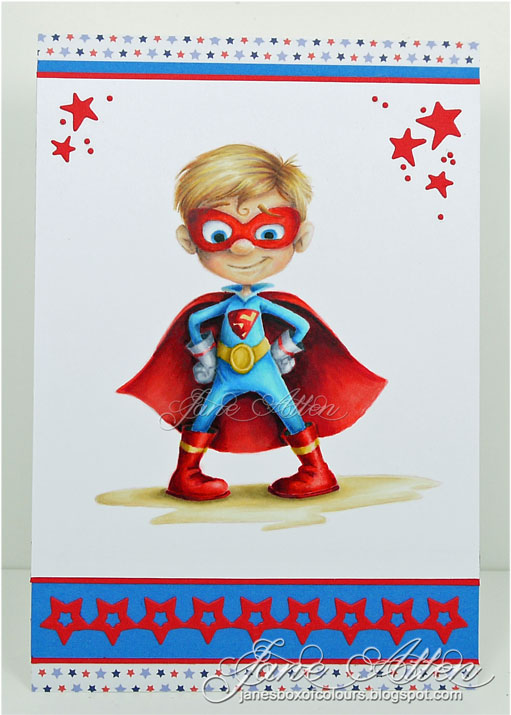
Super Boy by Whimsy Stamps
DP - Best of British paper pad
Star dies - various
Copics:
Cape - R21, R22, R24, R29, R39, W0, W1, W2, W4, W6, W8
Suit - B00, B12, B14, N1, N2, N3, YR20, Y23, YR31, Y26, W1
Skin - E0000, E000, E00, E41, V20
Hair - E23, E13, W1, E21, E53, E50
Boots - R21, R22, R24, R27, R29, R39, W1, W2, W4, Y23, YR21, Y26
Mask - R22, R24, W2, W4
Floor - YR30, E50, E51, E81, E42, E43
Gloves - C0, C1, C2, C4, C6, R21, R24

Stamped with Memento Angel Pink

and here is the cheeky chap in close up


as you can see the no lines colouring gives a much softer effect - probably my favourite technique!

Hope you all have a fab weekend and thanks for dropping by