29 May 2018

MFT MAY 2018 - HITS & HIGHLIGHTS

Well, hello there, welcome to my blog, thank you for dropping by.


The theme this month for our Hits and Highlights feature is:
"Magical May"

I opted for a literal take on the theme, choosing images from our catalogue and adding a couple of my own that conjured up Magic to me!

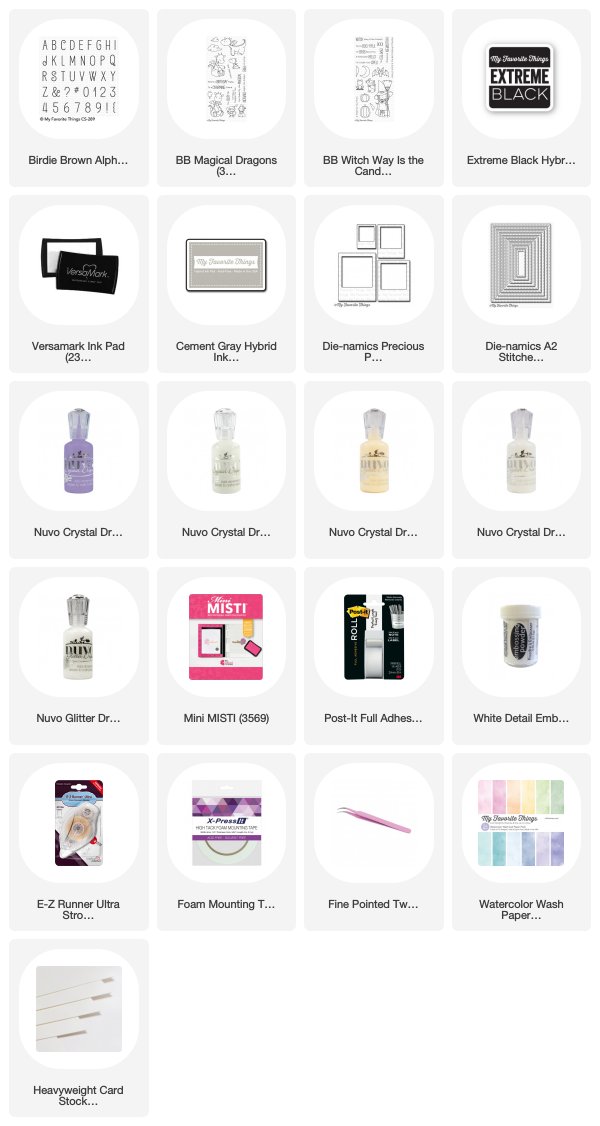
A background cut from the Watercolour Wash paper pad with a die from the A2 Stitched Rectangle Stax 2 was adhered to an A2 Smooth White top folding card base.

The photographs were cut from more Smooth White card using the Precious Polaroids die set.  As I was using Copics (available HERE), the centres were cut from Copic suitable card.  Both the dragon and cat were stamped using Hybrid Cement Grey ink, whilst the magic wand and bubbling cauldron were drawn by hand.

As for the wording - The M and D are from Birdie Brown Alphabet and Numbers stamp set whereas the S came from Which Way is the Candy as the other S was too big.  I was able to do this with the aid of Post It tape to mask some of the sentiment whilst inking, a technique I used to stamp Magic instead of Magical from Magical Dragons.


COPIC COLOURS:
Dragon: G00, YG41, YG45, B41, B45, C2, C3, C5, E81, E84, YG21
Eyes: E11, E17, W8
Background: B0000, R0000
Wand: W0, W2, W3, W5, W7
Background: BG0000, B0000, B000, B00
Cat: C3, C5, C7, W8, B91, B93, RV93, YG41, YG45
Background: B0000, YG0000
Spell: YG41, YG45, C2, C3, C5
Background: B0000, YG0000

For M Magic and S Spell I added extra detail with various colours of Nuvo drops which I also used to decorate the background paper.  I also stamped ABC on to the "Spell" photo with Versamark ink and then heat embossed it with White Embossing Powder.

Once the coloured images were glued into the Polaroid frames I adhered them to the card.  Both the Dragon and Cat were fixed with a Tape Runner, whilst the other two images were adhered with Foam Tape for added dimension.


I hope you liked my take on Magic May.

Until next time,
Happy Colouring.


SUPPLIES USED:

25 May 2018

ARTISTIC EXPRESSION - MAY 2018

Hello there, thanks for visiting my blog.

It is time for another

and this month I have instructions on how I coloured a cactus!


So if you're curious as to what I've been up to then please click on the link below to read this months feature on the MFT Blog - I hope you find it informative and that you give the technique a try.


Oh and don't forget if you have any questions - please ask!

15 May 2018

MFT AND FRIENDS - MAY 2018


Today I am taking another look at our recent May release:


If you've been following me for a while you will know by now I love sewing almost as much as I love colouring so I decided to combine the two for todays project.

I started with the new Scallop Cross-Stitch Tag and used just the pierced element - cutting out a grid on a piece of white Yupo cardstock.  This is amazing for stitching - it's synthetic, so won't tear as readily as paper based card - great for beginners who may pull the threads too hard.

As you can see I used a plain cross stitch in three colours for the lower area using 4 strands of embroidery thread.  The upper portion was sewn with 2 strands of thread using a simple square stitch that covers the area quickly and easily.  (It's basically diagnals of back stitch, which once complete give the appearance of squares.)


The little boy was stamped on to Copic suitable card using Hybrid Cement Grey ink and coloured with Copics (available here) and a touch of pencil enhancement.

COPICS USED:
Skin: E0000, E000, E40, E41, V20, R20
Eyes: B21, B26, W10
Jeans: B91, B93, B95, N0, N2, N3, N4
Shoes: W0, W1, W2, B16, B18, N4
Shirt: B000, B00, N2, N0
Hair: E21, E23, E25, E27
Cat: E11, E13, E15, E17, RV93, YG61, W4, W8


Once completed, I adhered the stitched panel to a Smooth White card base with foam tape and glued the little guy onto the sewn panel with Multi Medium Matte.

Thanks for dropping by my blog today, don't forget you can keep up to date with my latest work by following on Blogger, signing up to emails (see side panel on blog) as well as my FACEBOOK PAGE and INSTAGRAM.

Until next time
Happy Colouring


SUPPLIES USED:

10 May 2018

MFT MAY RELEASE - JUST ADD COLOUR

Hello again, I'm back with one of our newer monthly features:


As you may recall, this is where we showcase elements from our new release with colouring as the main focal point.

I started with a piece of Copic suitable card and cut out a stitched square using the Inside and Out Stitched Square stax. Then with the Basic Shapes Circles stencil, inked random circles with Natural Hybrid ink and turned those simple inked circles in to spheres using Copic makers (available HERE)


I kept the colour palette quite simple by using purely earth tones and greys..........but I would suggest that should you want to try this at home, learn from my mistake and make sure you ink your circles well enough.  I had been a little too light handed with the inking and as it dried I was really struggling to see the circles.........lesson learnt!

COPIC COLOURS:
E11, E13, E15, E21, E23, E30, E31, E33, E34, E40, E41, E42, E43, E50, E51, E53, E55, E81, E84, W0, W1, W2, W3, YR30


Once coloured I adhered the finished piece on to a top folding square Sweet Tooth cardbase, with a Natural mount.  The sentiment, from the the Bubble over with Joy set was stamped onto Copic card with Hybrid Kraft ink and cut using the Fishtail sentiment strip from Blueprints 27.

A different approach when using those stencils in your collection and a great way to practice your Copic shading.

Happy Colouring

SUPPLIES USED:

9 May 2018

MFT RELEASE DAY - MAY 2018

Oh yes, the time has come for you to go shopping and grab all those crafty goodies you've been drooling over for the past few days...........but before you go I just wanted to share this:


 I have fallen in love with the new Birdie Brown Little Buddies stamp set - it's so cute!

I started with a piece of 80 lb Desert Storm cardstock and cut out a stitched rectangle using the A2 Stitched Rectangle Stax 2 die set.  Then stamped the little boy off centre with Hybrid Cement Grey ink and coloured him with Caran D'Ache Luminance pencils.   


You can just about see the paw prints I stamped once all the pencil work had been completed.  In hindsight I should have double stamped them as the Natural Hybrid ink became far too pale as it dried on the card - but if like me you have a Misti, double stamping will prove no problem and alleviate this issue.


The sentiment, from You Make My Tail Wag balanced the composition. I used Versamark ink and heat embossed with White Embossing Powder.

OK, you've been good and read the blog post..................

But before you go, please don't forget to leave a comment on my blog in the section below - you never know you could be the lucky winner of a $100 MFT Stamps gift voucher!

NOW YOU CAN GO SHOPPING!!!!
(and please share what you create  #mftstamps )


SUPPLIES USED:

6 May 2018

MFT MAY RELEASE - COUNTDOWN DAY 3

Hello there, I'm back today with another new product from MFT that will be available to buy
Tuesday 8 May, 21:00 EDT at mftstamps.com

Todays card is a little different to my usual style:


The focal point of the card was created using the new Scallop Cross-Stitch Tag die in conjunction with our existing plain one.  

Once I had all the elements cut out I inked the pierced section with a combination of Broken China and Faded Jeans Distress Oxide ink.

Once dry, I stitched a kettle design, taken from a Kitchen Sampler (Leisure Arts) I stitched many years ago, adding a little steam with a combination of stitches and Picket Fence Distress Paint.

Now the mug was fun to create - I cut a shape from the Hot Cocoa Cups die set, coloured it with coloured pencils and blasted it with my heatgun, shrinking it into a little charm.  As for the tea bag, I simply cut out a Stitched Tiny Tag from Cement Grey card, stamped a sentiment from Coffee Break and added a little detail with coloured pencil.


The background paper was from Itsy Bitsy Polka Dots Kraft Collection which I cut to fit a top folding card.  To colour match it to the card stock I inked the edges with Broken China Distress Oxide.

A combination of foam tape and a tape runner were used to adhere the various elements to the card base with twine and button thread added as finishing touches.


Don't forget to comment on the MFT Blog today for you chance to win a $75 store voucher.

As for me, I will be back in a couple of days.

Until then
Happy Colouring


SUPPLIES USED:

5 May 2018

MFT MAY RELEASE - COUNTDOWN DAY 4

Well hello there and how are you today?

I have something pretty cool to share with you, involving stitching, sequins and the new Cross- Stitch Flower Frame.


As you can see, I went for a bold look, with zingy oranges and browns!


Instead of background paper, I chose to use the Cross-Stitch Rectangle die and decorated it with various fancy stitches.....for those of you interested, the small yellow ones are called Algerian Eyes and the large brown ones at the top are Eyelet Variations, with an additional French knot for decoration.  The frame around the sentiment was created with a combination of basic cross-stitch, Algerian Eye, French Knots, simple half crosses and back stitching.


The new Cross-Stitch Flower Frame was cut from Pineapple card and inked with Wild Honey Distress ink and decorated with a simple back stitch.  For the flower centre, I cut a piece of Orange Fizz card using a portion of the Cross-Stitch Rectangle and covered it with basic Cross-Stitch.  Then Brown Sequins secured with a seed bead were randomly sewn on top.

To tone in the sentiment with the rest of the card I inked a piece of tracing paper with Wild Honey Distress ink and once dry stamped it with Versamark before heat embossing it with Black Embossing Powder.


The elements were mounted on to an A2 Chocolate Brown tent fold card base with foam tape for added dimension.


Thank you for dropping by today, I hope you can visit me again tomorrow as I have another project for the upcoming May Release and again, it's a little different from my usual Copic and Pencil colouring!

Until tomorrow

SUPPLIES USED:

1 May 2018

MFT - HITS AND HIGHLIGHTS APRIL 2018

Well hello there, thanks for visiting my blog today.

I'm sharing a project that saw me get rather inky fingers, but oh boy I had fun!


"Flip for the Flops"


Yes, today the Design Team are sharing their Flop cards with you and here is mine:


I chose to use the Flop Card Rectangle die, teaming it up with a beautiful mermaid from Birdie Brown's Mermazing stamp set.

The A2 card base made from MFT Smooth White cardstock was inked with a combination of Broken China, Peacock Feathers and Cracked Pistachio Distress Oxide ink (hence the blue fingers).  The front fold and inside are inked, the back of the card remained white.

The front stitched panel which comes with the Flop Card Rectangle die was cut from Copic suitable card.  The image was as always stamped with Hybrid Cement Grey ink.

Hint/Tip: my eyesight is not great and I find that for me Grout Grey dries too light and Gravel Grey is still far too visible after colouring to be suitable for most no-lines colouring projects.


COPIC COLOURS (available HERE)
Skin: E30, E41, E42, E43, E44
Hair: YR23, YR27, E37, E97
Tail: B02, B04, B06, BG34, BG45, YG03
Top: BV00, BV02, BV04
Eyes: B12, B16, W8
Background: BG10, BG11, B00, 0


The inner sentiment panel was cut using the same stitched rectangle as above from Watercolor Wash Brights with a sentiment from Mermazing stamped with Blue Yonder Hybrid ink.

As my fingers resembled those of a smurf by this stage.........it attracted the attention of a cute little guy who I suspect has a bit of a crush on the mermaid LOL


I hope this has inspired you to give this type of card a try.

Thanks for dropping by, until next time
Happy Colouring


SUPPLIES USED: