Showing posts with label Magnolia. Show all posts

19 April 2015

I've been playing

I make no secret of the fact that I love working with pencil....
primarily because I've been using them since I was a tot, they suit my style of drawing - I'm fussy & pernickity and I just love adding detail!

Yeah I know I should loosen my style, believe me I've tried. 

So I struggle with markers, yes you heard that right peeps...I STRUGGLE 
 to achieve the same level of detail.

Lets face it the point on a Copic Sketch is chubby in comparison to the point of a good pencil & some of the stamps we choose to colour are darned fiddly.........and then I wonder why I am sometimes pulling my hair out!!

And then of course we have the annoying phenomena that is "sticky Copics" - yes I am sure my detailed technique does not help but it's the same colours that go gloopy. I've heard & tried ny on all the tricks!  Sometimes I can rescue my artwork, other times my bin gets rather full!


Anyway, post migraine (not my smartest idea, I admit) I decided enough was enough - 
flesh tones and hair were not going to beat me!

Well that's where the Magnolia marathon began.......I am not joking when I say this gal got coloured & abandoned over 30 times!!  
With my sanity in shreds and suffering from a very stiff shoulder & neck 
(should have stopped when my neck started to seize & not soldiered on!)
I persevered and here is the finished card
(she says with a sigh of relief)


......and yes Tilda has features.....I know the stamp doesn't and last time I added a face I got a lot of grief & some very nasty comments.

I spent a small fortune on Maggies & they've sat in a box unused ever since - what a waste.

So I've finally put my big girl pants on, coloured my heart out to improve my skin and hair techniques and blooming well given Tilda some blue eyes.

Hugs

23 January 2013

Lets face it!

How many of you out there have created a beautiful card using
a Magnolia stamp only for the recipient to ask....
 
Why does it not have a face?
 
Well I have and if I am honest it has led to me ignoring my Magnolia and Hanglar collections!
UNTIL NOW
 
Magnolia/Hanglar purists please look away now!!
 
what do you think?

I am reasonably pleased with the results....however, I feel it is a little too early for me to produce a tutorial at present, I would like to master the technique first, but I intend to share with you how I do it in the not too distant future.
 
and here is a Magnolia
 
 
Although I am pleased with Tilda's face I am not so happy with either her hair or fingers.....I need to work much harder on these areas, but as they say "practice makes perfect".
 
This one is already calling for a re-do - so I may very well pull the image off the card and have another stab at it!!
 
Oh and apologies for not visiting your blogs over the last few days but I have been a little preoccupied with other things but normality should resume shortly.
 
 
UPDATE
 
It was never my intention to offend, I merely wanted to share with my readers how I had attempted to solve the one issue that had led to my Magnolia & Hanglar Stanglar collections being ignored and unused.
 
Ny on every time I gave a non-crafting friend or family member a card or gift with one of these characters on it I heard the same comments regarding the lack of features.
 
But I never expected the reaction I got from Magnolia luvvies,
some were very positive, whilst others were quite frankly downright rude.
 
There have also been questions raised regarding the copyright of stamped images - a grey area at the best of times.
(Please note that I have never been contacted by either Magnolia or Hanglar regarding the above pieces of work)
 
 
So I thought it prudent to withdraw my offer of a tutorial and
the stamps I am sad to say continue to gather dust!
 
 
Hugs


27 April 2012

Another inked Magnolia....


Hands up if you've had the snuffles lately!
I have, in fact all my family has.

So for any of you out there feeling a little under the weather

Note:
For some reason the photograph has come out much bluer than the actual card which is teal - sadly photography and Photoshop Elements are not my forte!!

Stamps:
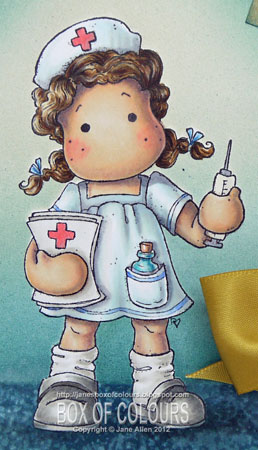
Magnolia - Nurse Tilda
Lili of the Valley - Sentiment

Paper:
My Minds Eye - Stella & Rose Hattie Papers

Misc:
Memory Box die - Valencia Border
Flat backed pearls
Ribbon from stash
Sewing machine
Copic Airbrush System

Colouring:
Copics


And here is a close up of Tilda ready to render First Aid,
not sure about the size of that needle though!!!


I had great fun with this particular project, a great excuse to play with my airbrush again.
But here I must make a confession, I had to spray it twice - guess who forgot to put a mask over the image first time grrrrrr!!
Whilst the mask was still in place I used a small natural sponge sprayed lightly with Isopropyl Alcohol, dabbing it on the sprayed area to create a speckled effect.  I then went back over the same area with darker shades of markers dotting around Tilda's feet to create a shadow.
Then I pulled off the mask, adhering it to a piece of tracing paper cut to size and popped it in a storage box so it can be re-used in the future and set to colouring the rest of the image as usual.

I thought I would enter Tilda into the following Magnolia challenges:
TOMIC: Get Well/Best Wishes with picture for colours/theme
Magnolia Stamp Lovers: Stitching real or faux
Totally Tilda: #45 Stitching


Ooh and before I forget, do you look forward to each new edition of
Magnolia Ink Magazine?


I do, and I am thrilled to say that I feature this time as
Blogger of the Month
What an honour!!


Thanks for stopping by the blog and as always should you have any questions please do not hesitate to ask.

Crafty Hugs

23 April 2012

Magnolia with a difference

OK, now how many of you have seen what my friend Barbara has been doing to Tilda and Edwin of late?

Well I thought I would do something a little different - I have attempted this before but I was not happy enough with the result to share........I hope Pauline will forgive me ♥

I would like you to meet Tilda's cousin!


Anyone have an idea as to what I should call her?

For those interested in how I did it, well I started off by sketching the features lightly in pencil, once I was happy with them I inked in the lines with a Copic Multiliner.
(If you are colouring with Copics make sure you use a pen such as this - or the ink may bleed)

I then shaded the face as I would do for a normal Tilda, but with the added features I was able to give her more depth and most importantly expression.  But I then used my coloured pencils to enchance the features further.

And yeah, yeah, I know it is a Christmas card and it is only April!  But I got caught out last year, leaving it too late to make them all, so I am trying to get ahead of the game and ensure that this year I do not end up buying cards.

Oh and before I forget - does anyone else have this stamp "Holding Tilda"?  If so, what did you have her holding - is there another stamp out there that works for this? 

I'd like to enter her into the following challenges:
(can you believe I found some for a Chrissy card in April!!!)
Cute Card Thursday - #123 Metallica
Moving Along with the Times - Merry Christmas

As always thanks for visiting the blog today

Crafty Hugs

20 April 2012

Some Maggies got inky!!

Oh boy, why is it that so many must have stamps arrive in the post only to be hidden away in a storage box and stay there without seeing a drop of ink................................ the shame!!

So albeit a little late here is my New Years Resolution....
...............to get inky!!!

And this is the first of many projects I intend to share with you all:


As soon as I saw this little dragon I knew she had to join my collection, in fact I splurged on quite a few of the stamps in this particular release!


Here is Lillyrose in for her close up.

Have you noticed that sometimes your images look a little fragmented - no I do not mean your masking has gone wrong,  just that the colours of objects within your project seem to fight with one another for attention and the whole picture fails to gel?

Try this - because I wanted Lillyrose to be the focal point, but not completely overshadow the castle I incorporated her body colours throughout the image - can you spot where? 
Answer at the bottom of the post.

For those of you who like to know which Copics I used brace yourself - there are quite a few!!


as well as....

Memory Box Tessatina border die
First Edition Paper - Animal Antics
Whimsy sentiment stamp
Twine from stash

I would like to enter Lillyrose in the following challenges:
(castles have big gardens AKA Kingdoms)


As always thanks for hopping by and hope to see you again soon

Crafty Hugs

Answer:
For those of you that said "flag" - well done.  But did you spot it in the scene I doodled behind the castle, in both the moat and grassland.  What about the castle rooves - it helped tone down the redness which was drawing my eye away from the dragon and yes I even added a little BG10 to the castle walls too.
How many did you manage to spot?

20 March 2012

Playing with Fluorescent Copics

How many of you have these little babies?

Well a couple of us girlies over on the Make it Crafty Team decided to have a play with the Fluorescent colours..................


Believe it or not this picture contains all of them
FRV1
FYR1
FY1
FYG1
FV2
FYG2
FBG2
FB2

Now the one thing I noticed is that they don't tend to play nice with other Copics - the dress has completely lost its glow when I blended FY1 with other yellows to create the folds etc.

FRV1 is the friendliest and does keep some of it's punch, but then there are some very zingy pinks for it to play with!

They are nice to have, but if I am honest I don't think I will be needing refills any time soon.

On the plus side - they do glow, so if you need stand alone colours that pack a punch then these little beauties will do the job.

All in all, quite a fun and interesting experiment!

If you have some, I'd love to hear your thoughts - have you found a way of making them play nice or are they as unsociable for you as they were for me?

Crafty Hugs


11 November 2011

I challenge you to...........

Colour an image with a light source from a lantern or candle within the image!

Yee gads, I hear you shout (or words to that effect)

That is the challenge we are currently running over at
MAKE IT CRAFTY

If you have a current copy of the new Magnolia Ink magazine you may have seen Zoe's guide on how to colour an image with a lamp - hence she decided to set us the challenge to try it too!

Well, ahem, where do I start on this one - having stamped out my image I masked her with Eclipse masking tape (awesome stuff) and covered the snow area with a roughly torn piece of kitchen towel and set to work with my Copic Airbrush (Oh boy that piece of kit is fun to use)

Then the hard work began, colouring by hand.  As with Zoe's tutorial, you must pay attention to your light source, but equally to the shadows - and don't forget to use your greys!!!

I had a blast with the snow, it is probably the most realistic representation of fresh snow that I have achieved since I started using Copics - not quite there yet, but I am getting there - and if I am totally honest it is a little too "white" for this composition.

That's enough arty waffle..............here is the list of stuff used:

Magnolia - Midwinter Tilda
Craft Creations Christmas Scrolls - Red
Ribbon from stash
Die-Namics - Fancy Flourish
Make it Crafty - Swirly Corners
Copics (see below)


OK this is the bit I love - inviting you guys to have a bash at our latest challenge and ask you to post your entries in the gallery HERE

In the meantime I am going to enter this little girly in to the following:
Charisma Cardz - Cutesy
Cute Card Thursday - Reds for Remembrance
Little Miss Muffet - Simplicity
Stampavie - Anything goes
Anything goes challenge - Stitches, real or faux

As always thanks for dropping by


7 November 2011

It's Maggie Monday!

Well that's what I'm calling it today any way!

And why you may ask, well it's a good excuse to show you one of those Swedish cuties that I have such fun colouring. 

This one is a sweetie and I thoroughly enjoyed colouring her dress.  I've also been playing around with tracing paper, adding white dots to create a delicate lace like effect.

Here's what I used:
Magnolia - Tilda with a small gift
LOTV - Corner Swirls & Christmas Circular Sentiments
Stempelglede - Vintage Garden
First Edition Paper - Festive Treats
Tracing Paper
White Gel Pen
Copics & Caran D'Ache pencils
Ribbon from stash
Sewing Machine
Distress, Memento and Chalk inks
oops and nearly forgot a dot or two of Liquid Pearls

And I thought I'd enter her in to a few challenges:
Crafty Catz - anything goes
Just Magnolia - anything goes
Catch the bug - anything goes
Dream Valley - anything goes
Magnolia Stamp Lovers - Christmas Challenge

Thanks for dropping by


28 October 2011

Magnolia Christmas

I smile whenever I colour this particular Tilda as she was my very first Magnolia stamp!


I have her sitting inside a Stempelglede Grunge Ornamental Circle (lg) and added a dash of colour with Liquid Pearls, White gel pen and ribbon.

And if like me you need a little bit of inspiration to get those Creative Christmas juices flowing why not treat yourself to the new Magnolia Ink Magazine - it's full of Festive Crafting goodness and an interview featuring Zoe McGrath from Make it Crafty!

Tilda was coloured with Copics (sorry no list) and as per Zoe's tutorial in Magnolia Ink I've used lots of greys!!!

I'd like to enter this card in the following challenges:
Just Magnolia - Christmas
Make It Monday - Anything goes
Simon Says Stamp - Anything goes
The Paper Shelter - Anything goes
Charisma Cards - Anything goes

Thanks for dropping by


6 August 2011

Make it Colourful and MAKE IT PINK!

 Oh yes, woo hoo, this weeks challenge over on Make it Colourful:
"Colour with pink"

and it's being sponsored by Bunny Zoe's Crafts

gif maker

This weeks winner will receive a £10 gift certificate


Here is my DT card for the challenge


I thought I'd have a change from my normal square cards! I realised once I'd made this that the swing now looks more like a window, especially after adding the extra piece on the top ( hides where I mis-measured the card & cut it too short, ssshhh) but I don't know about you, I quite like it.

 ..............and for those who like to know the colours I used I've included a pen-pic!


Other items used:

Images: Ribbon Swing from Make it Crafty,
Magnolia - Travelling Tilda (Bon Voyage Collection 2010)

Paper: DCWV Nana's Nursery Baby Girl
Additional: Ribbon and stones from stash

Why not pop over to the Make it Colourful site HERE and have a look at the other georgous pink beauties my fellow teamies created.

Come on, what are you waiting for, get those creative juices flowing, get colouring and remember ...........THINK PINK!

2 June 2011

M.M.M

"Mega - Masked - Magnolia"


Oh my this was a labour of love, not to mention second attempt!

I lost count how many masks I had to make to complete this project, and yep you guessed it I'd stamped over half of the original one when I stamped before I'd masked!!!!!

and here's the staggering list of ingredients:

Magnolia Stamps:
Sitting Alva
Sitting Alf
Mini Tilda
Mini World – Flying Tilda
Edwin's Village
Church
Fabric Roses
Santa Winter Forest
Ink Cap Mushrooms
Goblin Mushrooms
So Jolly Fungi
Mushrooms in a row
Death Cap
 
Copic Sketch:
BV: 0000,000,00,01,02,04
V: 17
RV: 00,21,23,25,29,91,93,95
R: 00,01,02,20,81,83
YR: 20,21,23,24,30
Y: 28
YG: 61,91,93,95,97,99
G: 0000,12,20,21,24,82,94,99
BG: 70,72,75,78,93,96,99
B: 0000,000,00,01,02,04,06,91,93,97
E:0000,000,00,02,11,13,15,17,18,21,25,30,31,34,35,40,41,42,43,44,47,50,51,53,55,70,71,74,81,95,97,99
C: 3
T: 0,1,2,3,4,5
W: 00,0,1,2,3,4,5,6,8
 
Colourless Blender
Stickles glue and white gel pen

After the first disaster, I really had to concentrate so I didn't make any more bloopers - I daren't work out the hours I spent on this little beauty, but I was pretty pleased with the end result - what do you guys think?

13 April 2011

Fairy Dust

Anyone who knows me well knows I love all things pink......................

I adore colouring Magnolia stamps & with this card I've let loose with Stickles, doilies & pearls for a really girly card. Not to mention the fact that I airbrushed the background with copics - woo hoo I love the smooth effect it gives!

Images: Magnolia fairies
Paper: From stash
Colouring: Copics
Additional: Sentiments by Lili of the Valley, Doily, Stickles, adhesive pearls

Short but sweet today

24 March 2011

Spring has sprung

OK, I admit it, I goofed!!!!!  I had originally planned to enter this card in to multiple competitions, a first for yours truly - have been a "one at a time" girl up til now!  But, yep you've guessed it - this multi-tasking Mum missed the deadlines so I'm down to 3!

Here is my entry for:
Magnolia Stamp Lovers: Die cuts
Magnolia-licious Highlites: Full size Magnolia Spring themed card
Just Magnolia - Favorite Color combo


Image: Magnolia - Circus Tilda, Magnolia - Spring Fence
Paper: BasicGrey - Eskimo Kisses, V&A Hanovarian Linen
Colouring: Copics, Chalk ink, Prismacolor
Additional: Martha Stewart Punch, Fiskars Hand punches, Cottage Cutz Daffodils, Nestabilities, Sewing Machine, Ribbon from stash

Do I confess to the fact this is was the second image?  Oh, what the heck, yep, "Calamity Jane" struck again - I carefully made my mask of Tilda and it wasn't until I'd placed the Fence stamp down on the card that I realised I hadn't adhered the mask over the top of my Tilda image!  Note to oneself to pay more attention. 

What do you think to the daffodils? It's been an age since I got my fingers inky colouring die cuts & I thoroughly enjoyed the challenge of making them look 3D.  


Copics list - after all the mishaps I did manage to remember to take a piccy!!!


Well, the deadline for one of the competitions is looming as I type, so if I don't want to miss out on yet another one I'd better cut this short & get posting!  Good luck to everyone entering.

Happy Crafting

21 March 2011

Gnomeo, Gnomeo where for art thou Gnomeo?

Anyone seen Gnomeo & Juliette?? My DH took me to see it - it was a real hoot!  So for my husband's recent 40th Birthday I couldn't resist sending him this!!!


The main image is by Dustin Pike, but I've teamed it up with a couple of Magnolia stamps & a digi tag.  I've mounted it on foam pads to give it depth.

Raffia & twine help finish off the front which has as usual been coloured with Copics (sorry no colour list this time)


The inside view of the card was incorporates yet another DP image......


..................and here is a side view which sort of shows the dimension I attempted to achieve.

Sadly, I forgot to take a picture of the Birthday Cake I also made for the occasion.


I don't know where last week went - I hardly did any crafting - oh well, lets hope I get to wield the Copics & create over the next few days!!!!


As always, Happy Crafting

26 February 2011

Love is .......

Love is................. not having a migraine any more!  My goodness, this one was really bad & I'm still not 100% but I am finally back in the studio & able to use the laptop phew!

Here's the card I made for my husband on Valentines Day - a Hanglar/Magnolia combo!

Image: Hanglar Stanglar girl, Magnolia Pink Bench, Magnolia Stitched Wooly Heart
Paper: Laura Ashley Connemara
Colouring: Copics, Prismacolor, Distress ink
Additional: Sewing machine stitching, Diamond glaze, Masking film, Stazon pad, Stamp positioner.

I had alot of fun creating this, including the use of a mask.  I've tried using Post-it notes in the past but found the paper a tad too thick and I got into a right mess with the non-permanent tape that I added to the non-sticky areas! So I splurged on a roll of Createx Masking Film & quickly found out you need to stamp your image on the film using Stazon not Memento! Then you simply cut out your images - in this case the Hanglar girl & Magnolia bench.

For those of you who've never done this before I thought I'd include a little guide: 

~ With Stazon ink stamp the Hanglar girl & bench on to masking film, once dry, cut out and put to one side.
~ Stamp the Hanglar girl, this time with Memento ink onto your chosen cardstock.
~ Once dry stick the masking film version over the top ensuring it fits exactly - with the mask being transparent it's much easier to place.
~ Stamp the bench using Stazon onto a Stamp poistioner & follow the instructions with it to allow you to place the bench exactly where you want it - remember to clean your stamp & use Memento when stamping your cardstock.
~ Now stick the masking film bench onto the stamped image.
~ With pink Memento ink stamp the Stitched Wooly Heart around your image.
~ Carefully remove the two masks & attach the backing paper to them (I keep all mine in a box so if I want to reuse the image I've got a mask ready & waiting!)
REMEMBER: Memento ink stays wet on masking film so be careful when removing the masks to ensure you don't smear ink onto your work! (Been there, done that!!) Tweezers are ideal for this.

After this has been done you are free to colour your image as normal - for me that meant Copics, Prismacolor and Distress ink with white gel pen & diamond glaze to finish.

Hope you've found this little tutorial helpful & if you've got any questions don't hesitate to ask.

It's good to be back

18 November 2010

Feeling lucky?

My mojo is returning slowly, and I'm hoping in future my son is a little less generous and keeps his germs to himself!!

So here is one of my latest projects using Magnolia's Tilda with Clover - as soon as I saw her I knew she'd be joining my ever expanding collection,  I remember as a child searching for the elusive 4 leafed kind - never did find one!


Card - Magnolia with charm

As you can see I had fun "playing" with shrink plastic.  Just in case you've not tried it yourself yet - I merely stamped the image onto the plastic with Stazon, then coloured it with Prismacolor pencils, remembering to include a hanging loop when cutting out the image so I could easily attach the little charm to the card.  All I had to do then was blast it with my heat gun & watch the image shrink before my eyes (remember to protect your work surface - those guns get very hot!!) - I always have an acrylic stamp block on hand to flatten the shrunken shape whilst still warm (not sure if you're supposed to do it, but it works for me)

As always, I've coloured the image with Copic Sketch on Personal Impressions Premier Quality Smooth White card and added small highlights with a Gelly Roll white pen.  The image, with assistance from Rachel's tutorial (see below) was mounted on Spellbinders Nestabilities, cut on my trusty Pink Cuttlebug.

I'd like to thank Rachel Jakes for a great tutorial on how to create an "out of the frame nestie" - her work is amazing & her website is well worth a visit. 

Image: Magnolia - Tilda with Clover
Paper: BasicGrey Olivia
Colouring: Copics, Chalk ink
Additional: Caption (Word Art World), ribbon from stash, sewing machine, shrink plastic, brad.

Thanks for dropping by and until next time............

Happy Crafting